Lillian Trigg Reborning

width="911"> 

  Quality Products - Unbeatable Prices - Great Service

www.lilliantrigg.co.uk

The Air Dry Paint Tutorial

by Linda Stewart

The aim of this tutorial is show the basics of using Air Dry Paints.

F.A.Q.s

If you are worried about using your oven to dry your paints or hubby objects to finding
an assortment of limbs and heads cooking away then there is an alternative.

I have done some extensive testing of these products and I am now satisfied that they are up to the job and give as  good a finish as heat set paints. They dry naturally with no odours and are easy to use, although they will obviously dry in the palette if you leave them too long to cook dinner! (That's why I have some new palettes with lids) Another advantage is that these paints do not react with plastics and tools and brushes can be cleaned with soap and water. In addition to the basic set of paints you will need a Sealer to seal the vinyl before painting and the Medium to use as a thinner, but this is no different to using thinners with Heat Set Paint except it is odourless, mixes with water and is non-flammable.  

The kit I am using is Robin, in this instance I have just used the head as an example.

First we need to clean the vinyl to get rid of any residue oils left after washing, I use an alcohol swab for this. Then we need to seal  the head using the Sealer mixed with the Medium in equal parts. A pouncing sponge does this job well.   

This tutorial is now available to watch on YouTube 

Using an alcohol swab to clean any oil residue from the vinyl  after washing. Mixing the Sealer & Medium in equal parts.
Loading the pouncing sponge. Pouncing the head.
Use a brush on ears and deeper crevices. Allow to dry.
 

When the sealer is dry (approx. 30 mins.) we can then add a Mint Base coat if required.
Mix a pea size blob of paint with the same amount of medium and water to a milky consistency.

 
Pea size blob of paint. Adding the medium and water and mixed to a milky wash.
Applying the Mint-Base using a Large Pouncing Sponge. Pouncing out using a Cosmetic Foam Sponge.
Getting into the creases. The head with mint-base applied.
 

I like to use 2 coats of Mint-Base. We are now ready to start painting our baby. After applying the flesh tones of your choice
(mixed the same way). We can then add veins using the Pthalo Blue and a touch of Pthalo Green. Place a dab of each into
your palette then add the medium and water.

 
Again, pea sized blobs of paint into the palette. The medium has been added.
The water is then added and mixed to a wash. The veins are painted on.
 

We can now highlight the creases and folds and add the mottling.

 
I use Burgundy and Burnt Umber for this stage. The paint is mixed and ready to apply.
The creases and folds have been painted using brush & foam wedge. Loading the Natural Sea Sponge for mottling technique.
Add a little at a time. Soaking up the excess paint using a Cosmetic Foam Wedge.
 

Our head is now ready for fine detailing.

 
The head is now ready for fine detailing. The completed and varnished head.
The Matt Varnish should be applied very lightly using
a large pouncing sponge.
I have used Aleene's Baby Tears to moisten the mouth & nose. You can still use your Genesis 3D Medium on the eyebrows.
 

As you can see Air Dry Paints can give just the same life-like qualities as Heat Set Paint,
although I have had to be a little heavy handed for the benefit of the camera.

All tools and paints used are available on the Lillian Trigg web-site.


I hope this has been of use to you, Linda...

Robin, pretty in pink !


F.A.Q.'s

Q. Why add Medium and not just water?

A. The Medium I supply adds transparency and allows the paint to retain its' adhesion qualities without diluting the colour. I would not         recommend water alone for applying to vinyl.

Q. How long does the paint take to dry?

A. The paint dries very quickly and is completely dry within 24 hrs. But curing of the paint is essential and will take 2 weeks to cure completely.

Q. Can I use heat to dry the paint faster?

A. Yes. I use my heat gun for areas where I want to speed up the process but you could also use a hairdryer if you don't have a heat gun.

Q. When can I root my baby's hair?

A. I normally leave for week after varnishing, then start the rooting process.

Q. What if my baby looks shiny after applying the sealer?

A. You can thin the sealer down more by adding a tad more water. However, once the painting is complete and Matt Varnish is applied the shine will go completely.

Q. Can I still use Genesis Matt Varnish?

A. Yes, you can. Use just as you would when using Genesis Heat Set Paints.

Q. Can I still use Genesis 3D (Thick) Medium for my eyebrows etc.?

A. Yes you can, before varnishing. I usually use a heat gun for this as I never put vinyl in the oven, but only as a matter of preference.

Q. Can I intermix the Air Dry Paints?

A. Yes just mix the colours together to make the colour of your choice. It's good to experiment!

Q. When I use other Matt Varnishes they dry with a sheen? Is yours any different?

A. I started playing with Air Dry Paints and varnishes months ago and after making many errors and using different products (all non toxic) . I am now happy with these results and believe these particular paints and varnishes to be a terrific alternative to Heat Set Paints.

Q. Can I remove the paint after it has "cured"?

A. Yes, you can remove Air Dry Paints the same way as with Heat Set Paints, that is with Acetone. This will remove all traces of paint leaving you with a completely reusable kit.
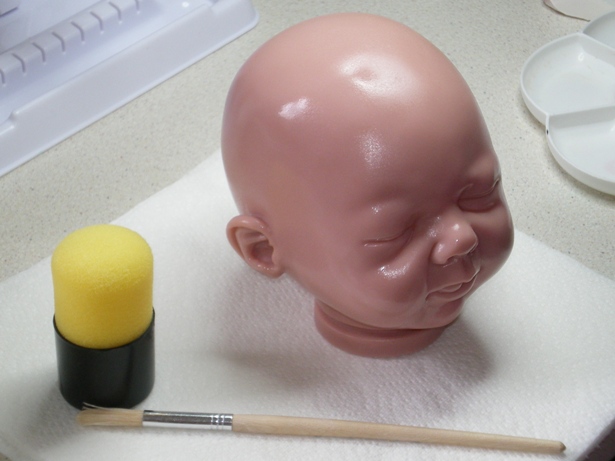
Matt Varnish Technique

Shake the bottle well before use. I use a tiny amount of Matt varnish in my palette and with a brush apply a couple of brush strokes to a large pouncing sponge, dab the pouncing sponge on to a piece of kitchen towel to remove any excess, then pounce over a small area - repeating until the varnish is just a very thin covering (you can also use a cosmetic sponge to go over the area). Everything has to be applied in very thin layers. A second coat may be added if required. 24 hrs. is required between coats.

Time and patience gives the best results.

                                                                                               Linda...x


TOP

Home Page

Close Window

Copyright : Lillian Trigg of Rochester®. Not to be duplicated without Permission.

Copyright Lillian Trigg of Rochester © 1996   -   Site Map   -   Contact Us